Why Join VTech Club?
Joining is free, fast and full of great benefits, such as:
- Promotions and offers
- Monthly £1,000 prize draw*
- Regular competitions
- Special offers for our members
Added benefits
- Register your VTech products
- Apply to be a Product Tester
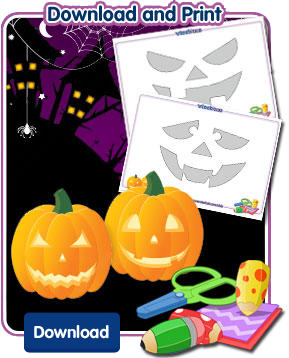
Halloween Pumpkin stencils
Safety first
DO NOT leave children unsupervised during any craft activity.
Adult supervision is required. Carving is for Adults — Little hands and sharp utensils do not mix. Let them remove the pulp instead.
Use at your own risk. We cannot accept any liability for accident, injury or damage to property caused by any tools or material during any craft exercise.
You will need:
Instructions:

- A pumpkin
- A printer
- One of our carving stencils
- Spoon or pumpkin scoop
- Small nail or pumpkin poker
- Serrated knife or pumpkin saw
- Pumpkin light or tealight candle

Step 1:
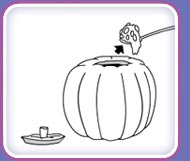
Cut a hole in the top for the lid. Make sure you angle the saw inwards so your lid sits on top of the pumpkin and doesn't fall through.
Scoop out the seeds and strings with the spoon.
Scrape some of the flesh from the inside so your pumpkin is about an inch thick all the way around (or at least wherever you'll be carving). You can poke a straight pin through it to test the thickness.

Step 2:
Trim off excess paper from stencil and tape or use pins to affix the pattern to the pumpkin.
If your pumpkin is quite lumpy, dip the paper in water or vegetable oil.
Smooth the pattern onto the pumpkin, affix with pins or masking tape and let the paper dry. You can also make small cuts in the paper where it bunches so it lies flat on the pumpkin. Add pins or tape to hold.

Step 3:
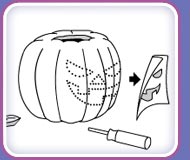
Poke holes through the pattern with a nail, push pin or pumpkin poker. Make the holes about 1/8 inch apart (or even closer for more complicated patterns). This step can take quite a while so be patient.
Remove the paper from the pumpkin.
If you want to, you can draw the pattern onto the pumpkin to make it a little easier...

Step 4:
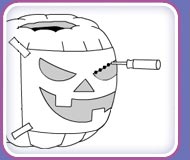
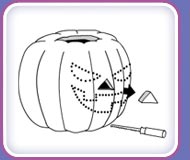
Push a nail through the pumpkin skin where you want to start carving.
Using your nail hole as a starting point, cut the design with your serrated knife or saw.
To remove pieces, push them out from the inside. For larger pieces, you may want to cut them into smaller bits and remove them in sections.
Push a nail through the pumpkin skin where you want to start carving.
Using your nail hole as a starting point, cut the design with your serrated knife or saw.
To remove pieces, push them out from the inside. For larger pieces, you may want to cut them into smaller bits and remove them in sections.

Step 5:
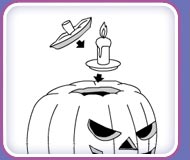
Once your pumpkin is all set, use a pumpkin light (safer than a candle) or a candle in a candleholder designed for pumpkins to light it up.
Light the candle and place it on a piece of tinfoil inside the pumpkin. Put the lid on. Let it burn for a minute.
Remove the lid and there should be a smoke mark on it.
Cut a vent in the lid where the smoke mark shows.

Step 6:
To be in with a chance to win a Kidizoom Twist worth £49.99, take a photo of your carved pumpkin and upload it to the Kidizoom Gallery.
Please see our Terms and Conditions for further details.
To be in with a chance to win a Kidizoom Twist worth £49.99, take a photo of your carved pumpkin and upload it to the Kidizoom Gallery.
Please see our Terms and Conditions for further details.


 Download


